It has inspired me to finally try OpenSCAD, and I’ve started to put together a parametric version of this: https://u.ale.sh/braunscadv1.png
Not really ready for primetime yet, just wanted to share :-)
EDIT: a quick question: would you be open to sharing your version under a more permissive license? I’d love to reuse some details if you don’t mind, but I’m not sure if I can do that with the current terms.
Curious if you got a response as I'd love a parameterized version of this design. I have the original Overwork+Scott version on my bedside, but I'd much prefer a storage space than a charger there.
To build atop of OP's response, the Bambu Lab line of printers are much higher quality than some older printers. I have 3 different ones, and I also just pull them off the build plate and begin using them.
Many modern printers also give similar results, but may require a bit of tuning. Also it's as much about the settings in your slicer software, and most current ones have evolved to have great defaults and are easily tweaked.
I'm potentially in the market for a 3d printer for our office. Mostly for one offs and some prototyping, and we don't necessarily need one but more a wouldn't-it-be-nice kinda thing. The Bambu Lab printers look like they could fit our needs/wants really well, but I'd love to do a bit of compare and contrast before placing an order. Are there any buyer's guides out there you would recommend for hobbyists such as us?
Totally agree, I used to muck about with a couple Creality ones and was totally spending much more time tinkering with the printer than actually printing.
Got an A1 mini in the recent sale and it's been so refreshing being able to just focus on what I actually want to do, which is printing stuff.
- print quality and speed is similar (new MK4S seems to be a bit better)
- Bambu's design life is much shorter (Prusas are fully repairable with parts stocked in the online shop, and every new version release includes upgrade kits for old models)
- the amount of effort/babysitting is similar
- reliability seems higher on Prusa's side (no wonder, given that they print parts of the printer on the printers themselves on industrial scale)
Also, if this matters to you, Bambu behaviour (like patenting opensource designs they didn't invent [1] and hostile competitive intelligence [2]) seems quite problematic.
I have a Prusa i3 MK3S+, used it for years, a recent Prusa XL, a Bambu X1C and a Bambu A1 mini. I would pick a Bambu any day, except if you need large prints and need the XL's area/volume. Otherwise the Bambu printers are quite simply better on every possible metric.
I think prusa have been resting on their laurels and fallen very far behind. Bambu sort of raised the bar with their printers and the price points they are offered at. They took much of the tinkering out of the equation that filtered most people from producing quality prints.
If you're working with more exotic or engineering materials, it can still require a bit of work to dial in. But the most common like PLA, ABS, PETG will print without issue.
That's very unfortunate, as I do value open source hardware. However, I value my time more, and Pruša have become complacent and released incremental updates (most of their printers aren't even CoreXY), so Bambu turned up and are eating Pruša's lunch.
I don't think there's much inherent value in the CoreXY geometry. MK4S seems to outperform everything Bambu has both on speed and on quality (especially on overhangs and dimensional precision) despite being a bed slinger.
On the other hand, continuing the bed slinger line let Prusa provide an upgrade path for existing printers.
Forum comments have been the best resource for me. (Followed by joining the printer’s users’ Facebook group to see what sort of issues are most common).
The top SEO’d buyers guide websites are pretty useless in my experience.
That said, having owned a dozen different printers for my own business’s prototyping work, the Bambu labs are truly fantastic. I retired 3 ultimaker S7s for 2 X1 Carbons and haven’t looked back. The Bambu labs legitimately print 3-4x faster and have as good if not better surface finish. AMS system is ingenious. Only thing I did was x-y squareness/skew compensation so both printers make the same sized parts (the printers aren’t perfectly square from the factory). There are guides on how to use M1005 gcode command.
+1 for BambuLab printers. I have an X1C and finally I can work with the printer, not work on the printer. Get an X1E if you have special materials you want to print and/or want an entirely hardwired connection to the printer from the network.
Even the cheapest 3D printers have generally gotten really good recently... I have a new (lower end) Creality Ender V3 SE printer, and it makes perfectly clean prints like this out of the box if you use their own brand of filament and settings they've tuned for it- and it will do so on any new filament if you take the time to figure out the right settings.
On the finishing:
“Of course because I 3D Printed it with a PLA filamanet, it's not as shiny and glossy compared to actuall electronic devices. People use acetone and various solutions to make it shiny.”
The acetone (vapour) approach only works on ABS and is pretty nasty. For PLA your best bet is sanding. You could add some putty to make it a bit easier and get better results. You will then also need to paint it. All in all if the print quality is good enough best stick with that.
XTC 3D is expensive for manufacturing but is really good for these hobbyist projects. It’s really too pricey to do actual production runs with but the results are great if you’re just making something for yourself at home.
If you’re using a color that already has a decent amount of yellow in it or don’t mind the yellowing polyurethane and spar-urethane are also decent finishing options. They won’t work on colors like white though, obviously. Even grey is probably going to see a little too much yellowing from those.
With overhangs/bridges, you eventually get into the habit of just trying to design a part so you can avoid that. Sometimes, of course, it is unavoidable. But it is quite strange and nice how your brain starts to just morph use cases into a shape and orientation that makes it easily printable after you've been thinking in the problem space for awhile. Eventually you just end up baking up creative printing solutions that try to avoid the need for supports entirely where possible because introducing supports introduces so many downsides from not only the material cost, but also the aesthetics, time, and frustration perspective as well.
XTC is a good solution for some use cases, and quite bad for others, as outlined above. For the use case in the OP, probably it would be quite nice. That use case is one that is hobbyist level of output in terms of number of units generated but also one where aesthetics are quite important if not fundamental to the overall design. For this kind of use case XTC is a good fit.
The one other thing to consider, if you design to use stuff like XTC and even the urethanes I mention above, is that obviously it takes up some amount of space. So you have to factor that into the design. Probably what I would do is take my boundaries from the original design and increase the tolerance by maybe 1mm or so for the extra space the finishing agent will take up. Because I highly suspect that if you applied XTC to the dock in the OP that the phone would no longer fit after that due to the tight tolerances in the design without that adjustment.
I have a Bambu P1S, and I'm fairly sure the prints would look worse after sanding than before. I just use them all as they are, straight out of the printer, and they always look amazing.
The primary thing people complain about is the aesthetics of the FDM print lines. They give the appearance of a hobbyist look. Sanding and finishing is one way to alleviate that. I bet PLA doesn’t sand amazing since it’s mostly just sugar but PETG sands reasonably fine. I have sanded PETG and finished with spar urethane/polyurethane for commercial products to give them a nice professional glossy sheen with no print lines. I mentioned in a sibling comment XTC-3D as another option which is probably the best hobbyist product for this, but it’s kind of a pain to work with and it’s a little expensive. So not great for commercial use. For home use though it’s totally fine and indeed usually gives better results than the urethanes mentioned above due to lack of yellowing and being thicker and better at filling in the lines and giving a smoother appearance. People could honestly probably just use that product without sanding and be mostly happy with it because it does a good job of hiding the FDM lines even without sanding
We run one of the largest print farms in North America. Reflecting parent's sentiment, BambuLabs' P1/X1 series are capable of substantially finer layer height and consistency (0.08mm), with SLA-quality results. We dumped all of our FormLabs because of it.
We don't sand any PLA, anymore. If we need to control the surface texture, it's largely a function of the qualities of the filament and print speed.
Great to hear. I have a resin printer at home and almost never use it because it’s such a messy, sketchy (in terms of chemicals) pain to deal with. The fact that FDM is good enough now for a lot of aesthetics use cases is great. I’ll probably still have to reach for the resin printer for high pressure use cases (like injection molds) but the fact that FDM can do more than before and make commercial grade parts is really good news
The physical characteristics of the print surface also change at lower layer height with high infill. I wonder if that might be good for your use case.
I'm mentioning it because we were surprised how easily our molds separated when we moved to Bambu and didn't understand why. It turned out that the combination of the layer height and high print speed that gave the prints their smooth, matte finish with standard PLA also made them functionally non-stick.
We also discovered they're also at least tough enough for a car to drive over, which may have just been because of the thickness. I also sometimes print nylon and polycarbonate automotive parts for a mechanic which seem to have excellent rigidity and durability.
Indeed I suspect FDM is good enough for a significant hunk of use cases as you’re outlining.
As FDM printing evolves the number of use cases it cannot solve seems to be shrinking. Probably we need to get into physics requirements to cover the requirements that FDM does not solve these days. Which is great, it makes general plastics manufacturing super accessible to the masses when we can arrive at this. I wish there was a general FAQ thing available people would be able to use to determine what manufacturing process would be necessary at the product planning phase. Because I feel like if people knew that they could just 3D print plastics at scale that a lot more people would be willing to innovate in the hardware space, which is a space well known as being difficult to enter and fraught with all sorts of monetary and regulatory land mines.
In my experience matte filaments hide the layer lines much better. Between that and the overall quality of recent printers like the Bambu or the Prusa Mk4, I don’t find the need to do any post processing.
I do want to challenge you on this. I don’t have evidence matte filaments are better. I would love to see an example of these filaments outperforming. I believe it is true, but would love to see a demonstration!
It isn’t really that they’re better as filaments, it’s just that the matte nature makes them less reflective and therefore you don’t see the layer lines as much.
Performance wise, most matte filaments are more brittle and have worse layer adhesion due to the matting pigment, but do a good job at hiding lines as the reduction in specular highlights reduce the visibility of them. Another good trick is fuzzy skin setting with both length and depth settings at 0.4x-0.8x layer height.
For PPE: an effective respirator is not that expensive, should be wearing them and safety glasses for sanding as well. Only extra PPE you really need for acetone smoothing is some nitrile / latex gloves, and those are fairly standard in shop / art environments anywho.
Also, MEK, Methyl Ethyl Ketone, apparently smooths PLA out quite well too, but if you can print in ABS I would already be doing that for finished products anywho.
Question: Most docks have ample space around the phone to grip it and remove it from the dock easily. Your design encases the phone on every side. How do you get the phone out in the morning?
In theory, with parametric design (eg OpenSCAD, Autodesk Inventor, etc) a model could allow you to enter the phone dimensions and it automatically re-calculates the correct geometry.
In practice, experience says doing this (in a robust way) is a lot harder than it sounds. ;)
It's not really that much harder, as long as you know which dimensions you want to be variable from the start. Going back and changing everything after the fact is a massive pain.
I think it's doable with a parametric design in Fusion but it is definitely more work up-front or re-work after you have a working version. Getting a well parameterized and set of constrained sketches can be a time consuming process since I don't do it every day. It's probably the part I've struggled with the most in making 3D printable designs (I'm not OP but design cosplay props for my kids) since I don't always know what I want the final dimensions to be.
How’s the weight of it when the phone isn’t docked? Perhaps you could add an insert for a steel plate on the bottom so it has a nice feel when the phone isn’t docked?
It's not a lot, because I printed it with an infill of 10%. You can increase it, and make it around 40% or 50%. Some people also use sands to make it heavy. For now it doesn't bother me and I think because I'm putting other things on top of the tray, it doesn't move around easily.
It can be a bit painful to get hold of, but I’ve been experimenting with micro-suction sheets, which allows you to “stick” things down to smooth surfaces, without adhesives (the material surface is full of tiny pores that act as millions of mini suctions cups). And allows you to easily remove, and re-stick them later without leaving any goop behind.
It’s a nice way to stop these types of 3D prints from sliding around in surfaces, without having to resort to weights or lead shot, which it way more painful to integrate that you would expect.
I'd watch Superfastmatt's latest video on the subject, although I think there is one competitor in particular that is supposed to be a similarly good experience.
Because the STEP file has higher fidelity and can be edited as more or less common primitives. The 3MF file is just a bunch of triangles wrapped in print settings (it’s literally a ZIP with the STL inside, which is, in itself, the aforementioned bunch of triangles).
Shapr3D can import and export pretty usable STEP files.
Product designers are mostly on Instagram and YouTube unfortunately. It's rare for people to write like me. But /r/IndustrialDesign(er) and /r/Design are good places for written communication.
Thanks a lot for your support. A friend and I looked into the economics, but the lowest company willing to print was around $63. If you know of any services that provide 3D printing, I am happy to look into it.
I haven't downloaded your model but https://www.i-solids.com/ (US-based, FDM and MJF) and https://www.weerg.com/ (Italy, mostly MJF ) will both do instant quotes and you might get reasonable prices from them at scale. PCBWay and JLCPCB in China will also do 3d printing at reasonable volume, if you want to get an idea of a baseline price.
Competing products such as the Nomad stand, Zen, Courant tray are $100-140. I happily paid for each.
The design and high quality materials were worth it to me for the same reasons you wanted this design — it is functional art and doesn’t look out of place next to my other quality items I see and use daily.
I could see paying $120 for this dock. I bet this is the kind of thing that would succeed on Kickstarter. Sure, I could print and assemble it myself but that would cost me more than $120 in parts and labor.
I believe they want a minimum order of $1000 and only allow me to print it in a single color. Honestly, providing a physical good is a whole other set of issues with which I have no experience at all.
It looked like his design incorporated space for a standard case.
Actually, without a case I think there might be an interesting edge detail.
That wouldn't affect functionality, and look cool too!
I use a case for grip, not for the protection it provides. I'd be dropping this slippery device pretty often otherwise. I haven't been able to go case-less since the days of the iPhone 4.
> Apple fixes or replaces it for free
Where? In the US they charge $29 and up for repair with AppleCare+. $29 for the screen, $29 more if you damage the glass on the back too. $99 if you damage the camera or anything else that requires replacing the phone altogether.
HN revolves around YComb and finding ideas that make great products. Someone has come up with a brilliant solution and someone else is saying they want to buy it. HN isn’t about “hacker” purity, it’s about thinking through cool ideas and maybe finding a startup along the way.
Building your own, idk, mechanical keyboard? Hackerish thing to do, sure. But buying someone else's cool design is not against "the ethos", that's a silly thing to say. Supporting artisans in their craft is Good, actually, I don't see anything about this design which make it different that way.
that's a weird notion of hacker purity. did you write your own kernel and compiler and web browser, on your own CPU that you built from transistors you made in your parents garage? and then connected to an Internet of your own creation? or did you "outsource" some part of that process to others?
I did all my CAD work via https://www.shapr3d.com/. It runs on multiple platforms, but I use it on my iPad Pro. There are many other options, such as OnShape, Fusion, FreeCad etc.. However most of them have their own quirks
Onshape: It's public domain on Hobbyist plan, so anything I create has to be by default Public. The next plan they have is $1500 yearl
Fusion: This is the most recommended one, however it's macOS and Windows only. Their Hobbyist plan is pretty generous, but the UI is very slow on macOS and it doesn't have an iPad app.
For me, the iPad Pro is a huge enabler. I don't want to sit down in front of my MacBook because I already work the whole day. Second, with the Apple Pencil it's so much easier and intuitive compared to anything else.
The only ceveat with Shapr3D is the cost. I paid for the yearly subscription, which was around $299. And it's the cheapest of all of them btw.
If you're in Shapr3D you should change all your radii and fillets to "G2" in stead of G1.*
Currently all your corners (excepting the ones that use Apple's supplied bezier points) appear to be tangent but not curvature continuous. As someone with the utmost respect for the learning amateur I would like to kindly inform you that having G1 corners from just hitting "fillet" is the #1 way for design cognoscenti to ascertain that a model was built by an engineer. Alternatively you could try to mimic or offset the G2 curves Apple already paid a bazillion dollars to fine tune.**
* this particular industrial designer x mechanical engineer does not use Shapr but I do see G2 / curvature continuous fillet tools exist via their support page.
** this designer also thinks Apple's and Dieter's corners are too squashed square and has been building devices with slightly sharper and more accelerated corner curvature as the world's natural bends are parabolic or catenary. So roll your own and find your aesthetic voice!*
Interesting you said that, but I used G2 almost everywhere, except in the inner holes of the phone part. If you share a picture, I can happily show the Sharp3D equivalent. Maybe the G2 curvature wasn't as aggressive as it should be?
Huh, well apologies for the assumption though I merely have the blog images to go off. When I look at the render that shows the top ortho and the one for the bottom cable geometry the highlights end fairly abruptly. The only curve that visually looks C2/G2 to me is the acute angle blend between the tray edge and the back of the phone cradle, that has a nice acceleration of the radius in and out of the transition.
It's possible the Shapr rendering engine is not very subtle, or perhaps the G2 math is accurate in a strict sense but the output is not very differentiated from G1. It's mathematically possible for there to be a continual change in local radius, i.e. be curvature continuous, while still having local changes be sufficiently aggressive that it visually appears discontinuous at a human scale. Each CAD kernel seems to make these things in its own way, hence different industrial design studios will strongly prefer the use of certain 3D CAD programs to make their final master models (e.g. Alias). Personally I drive CREO as for ages most manufacturers overseas used pirated copies of Pro/E or CREO and thus I could send them "native" surfaces. In that program my preferred curvature continuous coefficient range was 0.52-0.57. I don't have Shapr access handy so messing around with the coefficients and finding a result that you like is outside my domain -- and perhaps you already did!
Still, all that is on the modeling side, but the best way to actually check the visual smoothness of your corners is to use analysis tools like curvature combs to check how aggressively the model is making transitions. It doesn't fundamentally matter if you use the built-in automatic tools or manually adjust b-splines in your NURBS: the smoother your combs change the smoother your corners will look. [I checked the support page for Shapr to see if it supports curvature comb analysis and saw nothing about it, so you may be out of luck on that front until future updates.] Absent that you have to just spin the model in CAD and see how smoothly the highlights roll around and hope the built-in rendering engine is doing its job well.
One last item of subjective crit in sculpting smooth models: when applying a fillet to an edge that turns a corner, such as your interior pocket, you'll have a less visually cramped and abrupt appearance if you use a fillet chord (edge radius) that's nontrivially smaller than the chord length of the turn it has to make (corner radius). Maximized fillets that come to hard corners and make a full spherical bubble, e.g. your initial models shown in gray, generally look less natural than those that allow the fillet to turn the corner. This lets the highlight work its way around in a racetrack form instead of getting "stuck" in the extremes.
Nice work dude, I wouldn't comment if it didn't seem like you're dedicated to making continual improvement and learning new tricks.
Thank you for the comment. I learned a lot from you and will look into these. Are there any resources I could use to learn more about these, especially sculpting smooth models?
Quite welcome! Sadly I don't know of any resources that are really useful when you try to put things into practice. Most of the tutorials / blogs / forum posts I've seen are not really that constructive nor sufficiently detailed to get into the truly useful practicalities. I personally learned the trade by (a) working in an industrial design studio as the token engineer & CAD jockey with "real" industrial designers pushing me to do better, and then (b) building my own kilohours of practice in aesthetically driven CAD modeling. Now as the design lead & manager on most projects it still takes me months of coaching my employees on subtleties to get things right, and even each project still requires an unreasonable amount of time tuning curves and corners. Like all professional practices this rabbit hole goes real deep. Still, you can get pretty far with brute force iteration and careful attention to detail. I think your progress thus far demonstrates that quite well.
Yeap, so I added the instructions on Gumroad's page (where you download the 3D file). I printed it where the bottom is touching the plate. And support is minimal supporting the tilted part of the model.
I might upgrade soon anyway but is there something preventing iPhone 13 Pro to not fit? I'm not aware of any changes between that one and 14, 15 and 16.
My 13Pro only displays the clock for ~30 seconds before turning the screen off (when I do the turn it sideways while charging thing, "Standby mode" I think its called?)
Actually probably not. Does it have the same size as the 14 Pro ? If it's the same you can use it with no issues. All the orange photos you see are from an 14 Pro, so it should work nicely.
I see a couple of sibling comments giving you great tips already. I am still in the painful stage of failing my way to success (though closer to the end than the beginning)
I will suggest a few things. Follow up each of these points with more research if you can.
Spend as little money as possible and prove to yourself you’ll actually like it. Then buy only the good tools you actually need for the project at hand. I have tools I bought that remain unused and I regret spending the money. Its not the tool’s fault but me going in a different direction.
It doesn’t matter what species of wood your first projects use. Prefer wood with straight grain and you should be fine for your first half dozen projects.
Read widely or watch many YouTube videos. There’s a lot of space for ideas, from carving spoons to making stick chairs to making furniture of any style. Note what inspires you but be aware the path to making what you like may take awhile.
First project: make a cutting board (only one piece! Learn how to make it look great and learn a finish) Second project: make a simple box (learn how to make things square, learn some simple joinery)
Safety first! I put this last so it’ll be the first thing you remember. There are so many ways to ruin your health, from breathing sawdust to using toxic finishes. Hand tools are generally better for your lungs than power tools. Soap or wax finishes are healthy and easy to apply. Just about everything else is toxic and you must protect yourself accordingly. Invest in safety glasses, masks and gloves. And a first aid kit.
Woodworking is an extremely rewarding pastime and I hope you get hooked. Best of luck!
He's got a very nice approachable style (almost the Bob Ross of woodworking?) and has some great beginner videos. He also sells a course with plans for gradually increasingly challenging projects. No affiliation, just watched a lot of his videos when I was first getting started with woodworking.
There are also (as you'd expect) thousands of other Youtubers doing woodwork, too. Steve's just a great starting place.
While conventional tools are nice and necessary, having access to a gantry CNC machine for cutting wood is a HUGE thing.
A CNC makes many projects a single step. Anything having to do with cutting plywood to non-rectangular shape or stencils or carving letters or ... yeah, do it on the CNC.
And, even if the project isn't a single step, a CNC can compress a bunch of steps and make the project way easier. And even the canonical "cutting board" may require the CNC for a flattening pass (edge grain through a planer has issues).
Whatever you do, do not get suckered into buying a bunch of machines right at the outset. They're loud, expensive, often dangerous and there's no limit to how many you might need.
Start with small projects and hand tools. People have been building beautiful things with a small variety hand tools for centuries and the lack of noise alone changes the entire experience.
I spent a couple years buying books and watching YT, especially Paul Sellers[0] before building anything at all.
The reality is that fine woodworking is a craft and takes years to master (I certainly have not mastered it), but one can create objects pretty quickly that feel wonderful to hold.
When you do get down to buying machines, a decent track saw can be much more versatile (and space efficient) than a table saw for a first purchase. FWIW, I have both and use the track saw 2-3 times more frequently because it's easier (though much slower) to safely and accurately break down large sheet stock. It's also the only Festool product I own.
I'm going to counter this with a simple "I ain't got time for that". The "that" being hand tools. I did take a course from Roy Underhill and loved the crafty vibe of hand tools, even bought a No. 4 smoothing plane in the shop above the classroom that I use occasionally. My personal preference is to use power tools for the majority of work because hand tools take too long to learn in order to get good output. Given that its a hobby for me, I don't have a lot of time for projects so I want to complete them and not spend all my time just getting better with a hand plane or a chisel. I am impatient.
Another personal anecdote is having a US software engineer salary provides for a tool purchase not being a big deal. There are tons of people that have expensive hobbies like photography, guns, drones, 3D printers, etc. so to me I'd rather buy a $600 planer than have to hand plane boards to make a desktop. I did discover a Milwaukee track saw recently which hands down I should have gotten years ago. So I will agree that should be the first purchase for someone starting... you can likely use that for almost all use beginner use cases that might call for table or miter saws.
Learn to sharpen tools properly. A sharp chisel and plane, and something like a Japanese pull saw to handle the big stuff (with a measure of delicacy due to its flexibility) will get you an impressively long way. But such implements can dull quickly, and there’s nothing more dispiriting (or dangerous) than a dull tool.
See if your local community college offers a class. I know that's not a sexy answer but I think there is something to be said for having access to all the big tools and not filling up your garage with random bits of lumber before you know how serious your interest in woodworking is going to shape up to be.
The old PBS New Yankee Workshop episodes are on YouTube. Norm Abram uses a lot of power and specialty tools especially in the later seasons but in the first season or two his shop and projects are pretty simple.
I follow your journey with admiration, Fatih, and I want to say that you are truly an inspiration. Congratulations on building something exactly the way you envisioned it—a remarkable achievement that is often overlooked but incredibly difficult to accomplish. Eline sağlık :)
>I'm still astonished by what you can do with CAD software and a 3D printer at home.
I really want to get into 3D printing, for neat hacks like this, but also because I've been fiddling with arduino and similar and find it difficult to really find good parts to mount them on, attach servos too and so on. Would be nice to just be able to print something that I know will fit even just for prototyping.
Anyone have a good suggestion for a 3D printer that is good quality, will last a while, and beginner friendly?
I used to group-think this too and talked mad shit about Bambu.
But after looking into it all the bad stuff doesn't really apply - they forked Prusa slicer which Prusa fans got mad at (ofc) but Prusa forked from Slic3r, sooooo nothing wrong there at all.
Bambu use an nfc tag in their filaments, not to lock people in as I (and others) thought, but to auto select the right profile when it's in their AMS (multi colour) system; it's still completely possible to use other brands and their slicer provides a couple non-bambu brand-specific profiles already, along with "generic" profiles/material that work pretty damn well by default.
I picked up an A1 mini during their recent sale and unfortunately after using it...I don't think I'll ever use my Ender 5 Plus ever again (poor thing)...when I have enough space I'll just buy an X1C.
They've made it just so...effortless. You know what, it even takes even less effort than a fucking 2d printer these days (HP/Brother et al).
Although primarily I'd really like to be able to print full colour 3d busts, I understand that the point of hueforge is that it's 2d because it works like a picture box/shadow box with the layers.
Doing 3d is just a regular multi-colour print I suppose but the only annoying thing is that small regions of colour just require too much flushing. :/
Oh yes, I can imagine the texture feels so interesting. The tactility is probably similar to something like sliding a Pokemon cartridge into a game boy. Or clicking a pen on and off.
One criticism of Bambu that I've heard is that sending prints over the network requires the public internet, which is not true with Prusa, which can do local-only network printing.
Well yeah ofc the camera feed goes thru the Internet so you can view it from anywhere?
I suppose they could bang a hole out thru your router & host something on the printer, then have your app sync your ip when on the wifi with the printer, but then if your ip changes when out & about you'll lose access unless you've set something up for it.
Gotta remember that Bambu is all about ease of use. It does have a LAN only mode, but I do agree that they should support some sort of plugin system for the printers and just refuse to support unless you're experiencing an issue while using 0 modifications/plugins.
I bought the Prusa Mini+ kit. It was educational, but a few months later I upgraded to a Bambu Lab X1C. It’s a much more expensive machine, but the print quality and consistency are worth it.
With the Mini, I was hesitant to try things because I was afraid the prints would fail and I’d spend forever calibrating things. With the X1C, I can crank out prototype iterations as fast as I can design them.
If you aren't sure you're going to pursue this for the long run, think about joining a makerspace/hackerspace first and trying out theirs. On the downside, many people with varying degrees of skill have used the machine and it may not be factory fresh in performance. On the upside, given a vibrant makerspace, there's somebody there who's responsible for upkeep and can help you over some of the bumps in the road.
My local makerspace is very active, and some very knowledgeable people who maintain the printers. But even with the limited amount of people permitted to use the printers, they still fail way sooner than they otherwise would at the hands of a single, experienced operator.
Bambu is surely the best option if you have the money to spend, but I wanted a budget option, so I got a used Elegoo Neptune 3 Pro for 150€ and I'm extremely happy with it.
I'm shocked by how well the prints come out and how little fiddling it requires.
I've set it up with Klipper now with an old mini PC I had around and a Playstation 3 Eye camera, feels nice to put old hardware to use and controlling / monitoring prints remotely is neat.
I’ve also had a good experience with my SV06, though if I were buying a new printer to replace it now I’d probably pick a Bambu.
It does require some tinkering and few minor upgrades (nylock mod for bed levelling, oldham couplers for Z-wobble) to get good results as well as plenty of profile tuning, though now I’m there it’s been rock-solid.
+1 to all of the recommendations for anything by Bambu Lab. It's as close to plug and play as you'll get. (Personally I feel the P1S with the AMS combo is the best value to price, but you really can't go wrong with any of them)
I just got a Bambu Lab A1 (Combo with AMS lite, which I can also recommend) and am really impressed how smooth and well designed everything is. They really put a lot thought even into how the product is packaged and assembled. The few parts that you need to assembly yourself are all color coded (but after installing the color coding is hidden).
With my good old Ender 3, almost every print required tinkering with settings, otherwise print quality was bad or prints straight up failed. It was great for learning about 3d printing but with the A1 I can just print everything in much better quality without worrying about any settings.
I only noticed recently that people are now printing in multiple colors (materials?) in one go - is that a new thing? Maybe something this manufacturer integrated?
Bambu Labs has the AMS, Automatic Material System that sits on top of the printers and makes multicolor printing pretty easy, holds 4 colors but you can link units together for up to 16. There's other companies that provide other multi-color solutions for other printers but Bambu's P1 and X1 series with the AMS really took off in the last 2 years.
If price is no option, Bambu labs is the way to go.
If you are tryna get a 3d printer on a budget, any of the Creality Enders, like the Ender 3 or the CR-6 MAX are good starting points within the ~$200 range.
Looks like the A1 is $489.00-$559.00. A $170-$200 3d Creality printer still fits into a different category and pricepoint imo for beginners on a budget.
Going against the consensus, I'd recommend a Prusa MK4S instead. It'll likely serve you much longer and will achieve better dimensional precision and slightly better quality at the same speed.
Be warned though, the printing part is just a tiny step in the rabbit hole. Soon enough you'll be lamenting the state of CAD, yearning for class A surfacing in your projects, and trying to decide between diving into Rhino/Grasshopper or mastering SOLIDWORKS.
I have a cheap Ender 3. I’ve had it for about 5 years and it’s been just fine. I did do a few upgrades along the way that helped a lot (bed leveling probe l, direct drive extruder, and second z axis screw drive). Figuring out how to add those was part of the fun.
If you wanted something more production/out of the box ready, you can certainly find it. But it doesn’t have to be a big initial investment. You can start small and then upgrade as you go.
I got myself a Ender 3 V3 SE for christmas, and it has served me very well once I got used to it, especially once I hooked it up to a pi running octoprint. However, I've heard that the Bambu printers are generally the most "plug and play" you can get
My ender 3 has autolevelling build in, that might be part of the new V3 stuff. I thought it might be giving bad results at one point, but it turned out to be an incorrect temperature setting
Adding the autoleveling probe and firmware made my Ender 3 usable. I still try to make sure the bed is somewhat level, but I agree that this is a must-have feature.
Another +1 for Bambu. Recently replaced an older Ender 3 with P1S and it's been a breath of fresh air. Ender was much cheaper but the many, many hours I spent on tweaking both the software and hardware... I was many times ready to give up on the whole thing.
Same. I struggled and struggled to print things on a two year old Qidi that just worked on a Bambu Labs X1. The Bambu has limits but they are in a very different place. The pace of development in this area is wild. Patent law may be slamming on the brakes though.
I used to joke that my favorite tv show was just spinning a model around and around that I was working on in freecad or kicad or openscad. It's honestly still my favorite tv show.
If you want something that just prints, and want to spend absolutely no time fettling or upgrading the printer, then either Prusa (which I can speak to) or Bambu. Bambu has leapt ahead of Prusa in terms of features, though. They’re more expensive than some competition, but you’re paying for the simplicity.
I just get bambulab p1s a few weeks ago. My goal was to find “iphone of 3d printers”. It is still not there but it’s as close to “press a button to print” as possible. So far I’m pretty happy with the device and software.
I suggest do a search for "makerspace" in your area - They can help you build the project & you can learn how to do it, and you might meet some great friends in the process.
I got the A1 mini for £169 and it's just unbelievable value. My only regret is not just getting the X1C. The mini was for me to trial the brand and it has exceeded all expectations (at least for PLA).
I like the design but it seems rather complicated with all the little crevices and such.
1. I would like to see just a solid block on the front, redesign it so when I stick the phone to the MagSafe, because it will hold, the phone completes the design rather than fitting it into the hollowed out piece. The phone should be able to just be placed on the front and let the MagSafe hold it in place. I should be able to just grab my phone and go, not have to poke it from the back.
2. The MagSafe charger used is fine for proof of concept but I would like to see the MagSafe part better integrated into the stand like it is with the TwelveSouth HiRise 3 (not the deluxe)
1. In the blog post I actually worked on that for a few days. But I didn't like it as much I liked this one.
2. Unfortunately the default Apple MagSafe charger that I can use as a customer isn't easily bendable like that. TwelveSouth and other companies use custom parts, so it's possible to integrate them in a better way.
There would be no need to “bend” the MagSafe charger. The TwelveSouth design keeps the entire MagSafe area (I.e. everything within the ring of magnets), completely flat. I doubt Apple would let you customise the MagSafe connectors physical properties if your within their accessories program.
Depends how fussy you want to be. But it would be pretty easy to design the MagSafe holder so you insert the charger from behind, and there’s a thin layer over the front to hide the charger itself.
Or if you want to get really fancy, the MagSafe magnet arrangement is well documented, and you can easily buy adhesive magnets that arrive in the correct pattern and orientation, which would allow you to embed the magnets completely within the print, and later add a standard Qi charger to provide power.
I’ve personally torn down Qi chargers and embedded them in furniture to create completely integrated, and “invisible” wireless chargers. On the whole it’s pretty easy todo, only major downside is higher power losses because there’s more space between the charging coil and the phone, and your coil alignment will be less accurate than Apple. But it’s still a completely functional charger.
> This particular design stuck with me. Initially I was spectical about it, but the more I looked at it, the more I loved.
Spectical sounds like an improvement over skeptical since it implies that you keep looking and don't just dismiss. If this was a typo we should consider it a coinage and run with it.
Alternately: Spectical - Specification skepticism. Doubts based on technical specifications that may later be assuaged by real world performance. "I was spectical of the Nintendo Switch because it had nine year old CPU, but it still delivered games that were more fun than the Xbox X or PS5."
I understood your parent comment as thinking of it in terms of “spectacles” (i.e. glasses) rather than “specification”. Emphasis mine:
> it implies that you keep looking
As in “On first glance I was spectical the chair could hold enough weight, but the more I looked the more I noticed little details that improved its strength”.
"Spectical sounds like an improvement over skeptical since it implies that you keep looking and don't just dismiss. If this was a typo we should consider a coinage and run with it."
This is awesome and a great demonstration of where 3D printing and a bit of design nous can get you
Last year I tried to design my own magsafe stand but it was proving to be too complicated to meet my criteria of looking good and be stable (the 15 Pro Max is big and heavy) and I didn't want to go down the route of making many prototypes/iterations so I ended up just printing a design someone else made [1] and it's been solid.
But I can see the advantages in making the phone still be the alarm clock, or else you'd run into problems w/ having an alarm on both the phone and on the clock. Plus it would be nice for the display to change if e.g. someone is calling me in the middle of the night. I can see why the design is the way it is, since presumably none of that would be possible if the dock is just a wireless charging cradle.
It reminds me of the cool ways the wireless charging dock for the HP Touchpad let you turn the tablet into an ambient clock or a digital photo frame, all the way back in 2011.
I also checked that first, unfortunately according to the Amazon reviews (Can't always be trusted) it seems to have some issues with positioning for charging where you have to place it pretty accurately to work.
I remember when Apple sold standing docks with their iPods. In another world, this would have easily been an Apple accessory. And for the same reason the author built it.
Very nice to see this, especially in relation to Apple design.
I use the similarity between the work of Dieter Rams and Apple's Jonathan Ives to illustrate the difference between homage, appropriation and 'ripping off'. I am cagey about where I stand on Ives but the students come to their own opinions.
I would love to get my hands on the CAD-Files to fit my Pixel 9 Pro to this case.
Also, has anyone found a nice solution for a "Standby Mode" Equivalent for Android? I tried a Daydream-Screensaver, but with that my phone get really hot and it also was very bright.
That's very cool! I can imagine using it with an old iPhone as a permanent, cloud-connected alarm clock. Would save having to pop the phone in and out every time.
I love this design. And this particular design and application highlights one neat property about 3D printing at home: you could have an open source design that is easily tailored to the end user's phone case (of which there are endless variations) and their personal everyday-carry pocket items.
Wow, this is fantastic. The idea of the tray on the back is so simple, but also brilliant. I have loads of extra bits on my table that would go so well in a tray. I love that they're connected. I think you've taken the original and made it even better.
Nice. I saw Scott's original design and thought it was very classic but wasteful of filament, and this one feels like a good replacement for my current MagSafe stand (which is also 3D printed).
I would like to see a parametric version for older iPhones, though (I have a 15 Pro, but there are others in the house...)
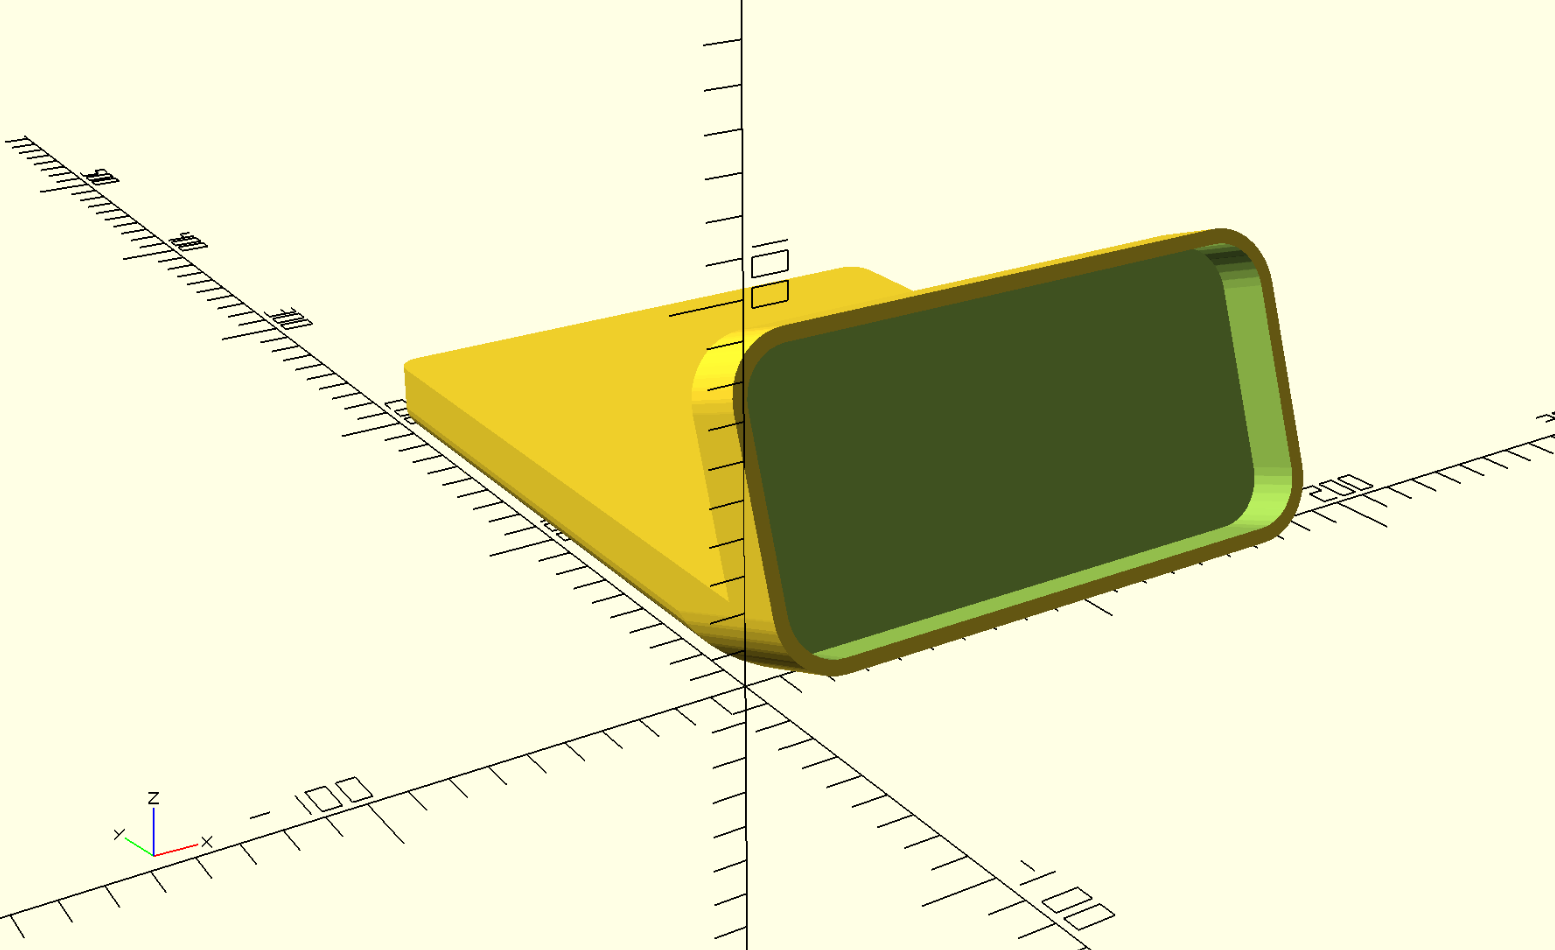
I just had a brief stab at this using OpenSCAD. The bottom curves are tricky (and of course OpenSCAD's lack of bevels and fillets is a pain), but it seems doable--given time.
I've had an idea for a dock that turns your smartphone into a landline of sorts. Plugs into an actual corded phone base and only rings the physical landline phone.
I remember at some point some novelty shops selling bluetooth and wired phones resembling old school landline phones, those could be a useful starting point for such a design.
qq: did you print it with supports?
this looks awesome. i printed the other version you mentioned in the article, but it didn't quite solve my nightstand problems, which you correctly identified and fixed with your tray. and it looks great!
really nice to see well designed, useful 3D printable products.
These kind of designs are essential for 3D printing to graduate from printing baby yodas only. Also, the high-quality photography and documentation helps a lot to go for the 3D print over temu.
You can. It adds a lot of work! It's surprisingly tough to sand. And sanding makes it look bad, so you end up having to use filler primer and/or bondo, then more sanding, and more painting. Here's an example: https://www.youtube.com/watch?v=ZTE9bJyUO_8
Yes, you can. If you want to do that, I'd recommend to print in ABS though. It's easier to sand and you can use vapor smoothing afterwards to get a very smooth and shiny surface.
Printing ABS is more challenging though and the fumes tend to smell.
> I might post occasionally, which will probably be a link to my blog post or a few honest questions/insights. I'm not leaving, of course, but I won't be active there anymore.
Actually, both are used for pushing out. I made it so both left and right-handed people can use it. The cameras are already taken into consideration, and you can use them on both horizontal sides.
It's not unheard of [1]. It happened a number of times in my iPhone ownership that the phone became significantly hotter than usual for no apparent reason.
SYJ[1] is one of the coolest creators on YouTube, if you haven't checked him out, I highly recommend it. His videos are very "hacker" in nature, and the film work is basically art.
OP here. Of course, there are commissions and taxes. First, you can download it for free, but you can tip (donate) any money. Say you gave $10; around $1.5 goes to Gumroad. And then, of course, I'll have to pay income tax on the rest, depending on your country.
Very cool. I've been tempted to buy a 3D printer for various little things like this but have yet to make the leap.
For those who haven't tried using standby mode as a bedside clock, I recommend it. Started using it maybe a year or so ago after buying a prebuilt magsafe stand, and the OLED panels that have been in most iPhones for several years now are very well suited to the use case — the panels can get quite dim (latest models go down to 1 nit!), there's few pixels lit up in the first place, and what light does get emitted is a sleep-friendly red. It's like the old red 7-segment display alarm clocks but even better since it's not as bright and turns off when no motion is detected.
It has definitely become an invaluable tool for taking care of things around the house for me. Things like broken light switch sliders, under desk mounts, things related to cable management, and any sort of custom bracket.
Going back in time though, I should have paid up for something with auto-leveling from the start. That is the most important feature. After using the $100 Ender V3 Pro for several years I'm probably going to make the jump to something from Bambu soon.
I heartily recommend the Bambu printers. I started with a Creality CR10, then an Anycubic Photon, then added an Ender 3 Pro. About a year ago I picked up a Bambu P1S and I was blown away. It's way more than just a step up from an Ender. Auto leveling, way, way faster, etc.
I also ended up adding the AMS, which is super handy.
Over time my conclusion with 3D printers is that the capital cost of the printer is (within reason) largely irrelevant. Unless you're on an extremely tight budget and are going to print in just one color, the cost of filament pretty quickly dominates. Especially with the inexpensive printers. $20-30 a pop adds up in a hurry.
OP here, yeap. Here is a list of books I have and recommend:
* Braun, Designed to Keep (Phaidon)
* Dieter Rams (Phaidon)
* Bauhaus (Taschen)
* Dieter Rams, So wenig wie möglich (it's in German, but there is also an Englisch version, from Sophie Lovell)
Amazon does have it on DVD or BluRay but not on Prime. And for anybody reading this: There's naughty stuff down the search results for me, so watch out... ;-)
Yeah people were showing off something very like this on YouTube a week or two ago. And that’s actually the second time I’ve seen these. I think you got scooped bro.
I came here to see if anyone is selling them. I don’t have a printer.
If you read the post, you'll see that OP was inspired by a similar design (which is linked as an embedded YT video) but designed his own to fit his other needs, i.e. making the back part a tray.
Article clearly says that he saw the existing ones and decided to tweak it for his use case? He didn't say he invented and patented it. Weird thing to complain about.
I've used Xometry and JLCPCB (in China) to 3d print stuff but it might be expensive for a larger thing like this. I now have a Bambulab P1 at my office.
I’ve used a local library. Their print settings are usually turned down in density, and you end up with a print that’s filament held together with boogers.
Seems like it should be a dumb LCD clock in front with the phone dock behind it. Now the iPhone can be grabbed off and used in an emergency. The BC21 shown is close, but the alarm and other features are redundant.
There's an eject button to let you grab the phone, and the phone exits standby as soon as it disconnects from the charger - I don't get what problem you are trying to solve?
From the OP's repy in another thread it appears that ejecting of the phone was not initially shown/written about in the first iteration of the blog post. Maybe the parent comment only saw the post before the update.
2) An independent time display also would be a tiny load, so the trickle vampire energy isn't being wasted.
3)Removing the only moving part also simplifies using the phone immediately. Do you want to be fumbling with an eject spring latch when someone is having a heart attack?
4)Compatibility: Now it works for Android, iPhone, Blackberry, or whatever other devices already use wireless charging.
The integration of multiple functions (tray, charger, clock) into a single unit is a clever solution to bedside clutter. However, have you considered how this might impact the flexibility of use? For instance, what if a user wants to charge their phone elsewhere or use the tray separately?
Lots of people put their alarm clock away from bed to make them get up. Also sleep hygiene says don’t have your phone handy at bed time. What you’re implying as bugs are features.